

To sew a woven label onto clothes, position it on the garment, hold it in place and stitch through the label and the intended fabric layer. You can sew it by hand or machine. The edges you stitch depend on the label's fold and where you want to attach it.
This illustrated guide covers sewing labels on by hand, machine sewing and adhesive backings. If you are ordering woven clothing labels, choose the attachment method before finalising the size and artwork.
Which attachment method should you use?
| Method | When to consider it |
|---|---|
| Hand sewing | A few garments, samples or positions that are awkward to reach with a machine. |
| Machine sewing | Repeated stitching where you can position and feed the fabric comfortably. |
| Iron-on or self-adhesive backing | Only when the particular backing is suitable for the fabric, application and intended care. |
Before you start
Gather your labels, suitable thread and needle, scissors, a ruler and pins, clips or basting thread. Choose a needle that passes through both label and garment without damaging either; the smallest available needle is not automatically the right choice. Match the thread to the label or garment where you want the stitches to blend in.
Lay the garment flat without stretching it. Measure the position and check the label's orientation. Keep the front and back of the garment, pocket bags and other unwanted layers clear of the stitching. Try one label on matching scrap fabric or a sample garment before starting a batch.
Where should you stitch a folded label?
| Label format | Typical attachment |
|---|---|
| Flat or border label | Stitch around the perimeter, within the space reserved for sewing. |
| Each-end fold | Stitch through the two turned-under ends to attach the label flat. |
| Loop or centre fold | Catch both open ends in the garment seam, leaving the folded face visible. |
| Hem tag | Wrap it around the intended edge and stitch through the attachment area and garment. |
| Mitre fold | Attach the two angled tabs at the intended seam. |
Allow enough label material for the chosen stitching and seam allowance. For diagrams and other formats, see our woven label fold guide. Our label types and placement guide explains neck labels, side-seam labels and hem tags.
How to sew a label onto clothes by hand
You do not need a sewing machine to attach a fabric label neatly. For a flat label, small backstitches around the sewing border are one option; small whip stitches over the edge are another.
- Thread the needle and secure the start. Use a manageable length of thread. Secure it on the underside with a small knot or a few anchoring stitches, keeping the fastening away from the visible design.
- Position the label. Measure it into place and hold it with pins, clips or a few temporary basting stitches. Check that it lies flat.
- Make the first attachment stitch. Pass through the label's sewing area and the fabric layer you intend to catch. Check the other side before continuing.
- Stitch the required edges. Follow the attachment pattern for your label fold. For a backstitch, bring the needle up a short distance ahead, then take it down at the end of the previous stitch. Repeat along the edge. Draw the thread snug without gathering the fabric, and remove pins or clips as you reach them.
- Secure and check the finish. Fasten the thread on the underside, trim loose ends and remove temporary basting. Gently check the attachment and inspect both sides for puckering or accidentally joined layers.

How to sew a woven label with a sewing machine
Use your machine manual to select a suitable needle, thread, presser foot and stitch for the garment and label. Test the combination on matching fabric first, especially with stretch fabrics or bulky seams.
- Secure the position. Baste, pin or clip the label if it moves. Remove pins and clips before they reach the needle; do not sew over them.
- Position the fabric. With the needle raised, lift the presser foot, place the work beneath it and lower the foot before sewing. Follow your machine's positioning instructions.
- Sew slowly along the attachment area. For ordinary sewing, the feed dogs should be in their normal feeding position. Guide the fabric without pulling or forcing it through.
- Secure the ends. Use the reverse or locking stitches recommended for your machine and fabric. Trim the threads and inspect the finished label.

A small label does not automatically rule out machine sewing. Basting and an appropriate foot can help with positioning. If the work will not feed reliably, stop and check the threading, foot and feed settings against your machine's manual.
Attaching labels with an adhesive backing
A sew-on woven label is not automatically an iron-on label. Check which backing you have before applying heat or relying on adhesive.
Self-adhesive labels
Check the specified surface preparation, application method and suitability for washing. Position the label on a flat surface and apply it as directed. Peel-and-stick does not, by itself, mean suitable for repeated garment washing.
Iron-on labels
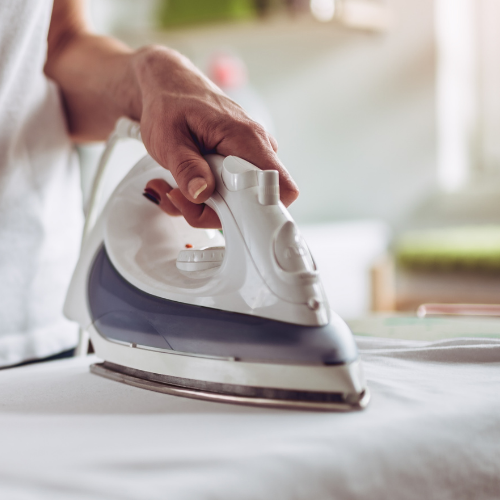
Use the instructions supplied for that exact backing, including temperature, pressure, pressing time, steam setting, cooling and any waiting period before washing. Confirm that the garment can tolerate the required application conditions. Test on matching material first; if the backing's requirements and fabric's limits conflict, choose another attachment method.
Common questions about sewing labels onto clothes
How do you sew on a name label by hand?
For a name label designed for sewing, use the same positioning and stitching steps above. Keep the name clear and use the label's intended attachment edges. Follow the supplied instructions for an iron-on name label rather than assuming it needs sewing.
Why is the fabric puckering around my label?
Check whether you stretched the garment while positioning the label or pulled the thread too tightly. With a machine, check threading, tension, needle and stitch settings against the manual. Correct the cause on a sample before continuing.
Should I use a professional labelling service?
For larger batches or difficult garments, compare doing the work yourself with an experienced sewing or relabelling service. Agree the label position, attachment and sample finish before committing the batch.
Plan your labels before ordering
Explore our woven labels and label samples. If you need help choosing a fold, size or sewing area, contact GB Labels with your garment details and intended attachment method.
Thanks for reading!
Pete
